by Bob and Christine Wass
When we lived in Sedgefield our vegetable garden consisted entirely of raised beds some six inches high. On leaving DOGA (reluctantly) and moving to Hayfield in the High Peak to be nearer to offspring and grandkids, we decided to adopt the same practice as we felt that it had been successful in Co. Durham. We included soft fruit in the bed system but top fruit in the shape of apples and pears – cordons and stepovers – is not included.
The system worked fine for a few years until old age and decrepitude took over. Bob has lost the cartilage which, in his distant youth, used to stop his kneecap from rubbing against his knee joint, so that now he has both difficulty and pain in sowing and weeding at ground level. Therefore, we have had four higher raised beds constructed which were filled with top soil and which have been in use for one year.
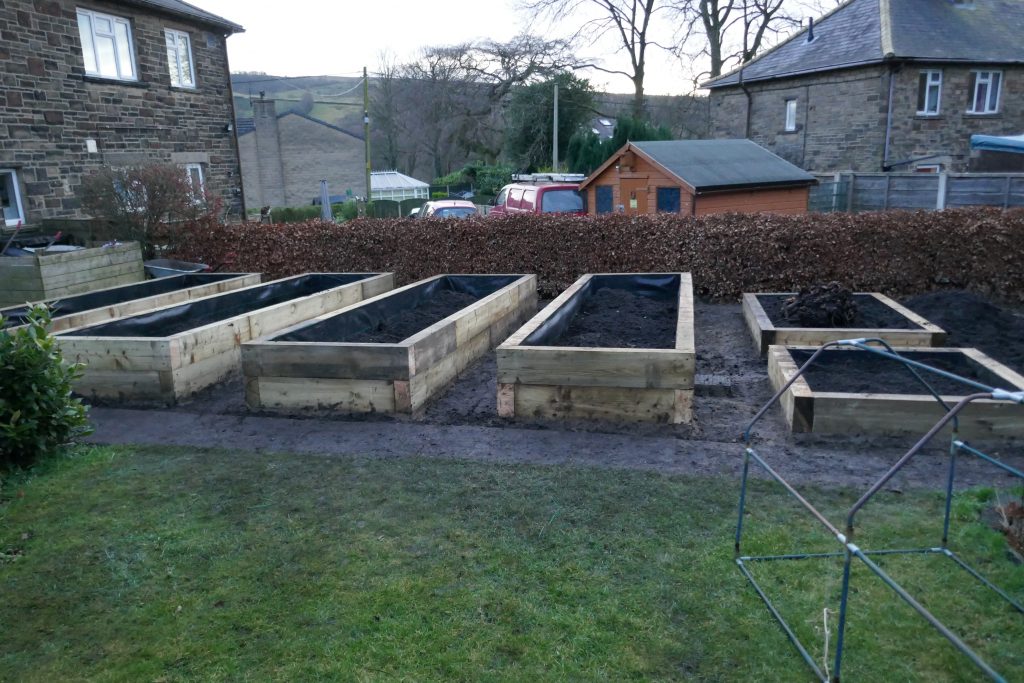
The new raised beds are made of railway-sleeper type blocks of pine and are some 18 inches/46 cm high. The external measurements are 15 feet/460cm long by 4 feet 4 inches/132cm wide, giving internal measurements of 14feet 3 inches/434cm by 3 feet 6 inches/107cm. The insides of the walls are lined with impermeable fabric which is stapled at the top to the walls so as to prevent soil spilling down between the fabric and the wood. The size of the beds does make them rather striking and our neighbour did plant a new hedge after we had them constructed!
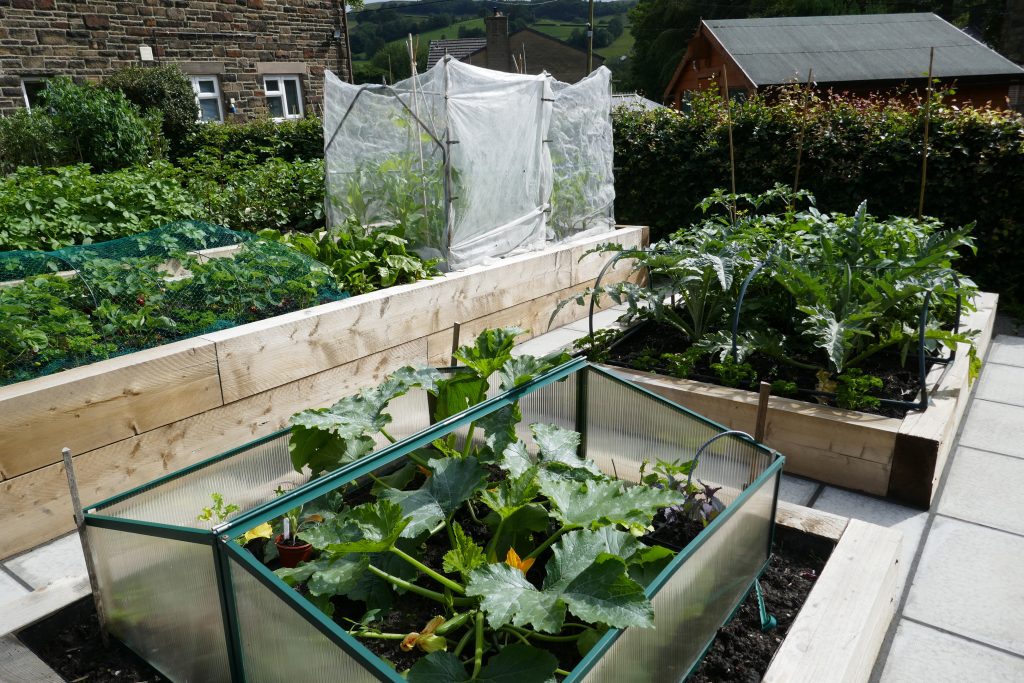
The advantages of the new layout are noticeable. Sowing, planting out and hand weeding are carried out at a much more comfortable height, although you do have to take care not strain your back by leaning forward for too long. Since the soil level is so high, it is easy to see what is going on without having to scrabble around at ground level. It is also easy to reach to the centre of the bed and you can even garden sitting down on the structure since the walls are some 5 inches wide. For plants which may need protection, we have found it easy to erect supports to cover with mesh.
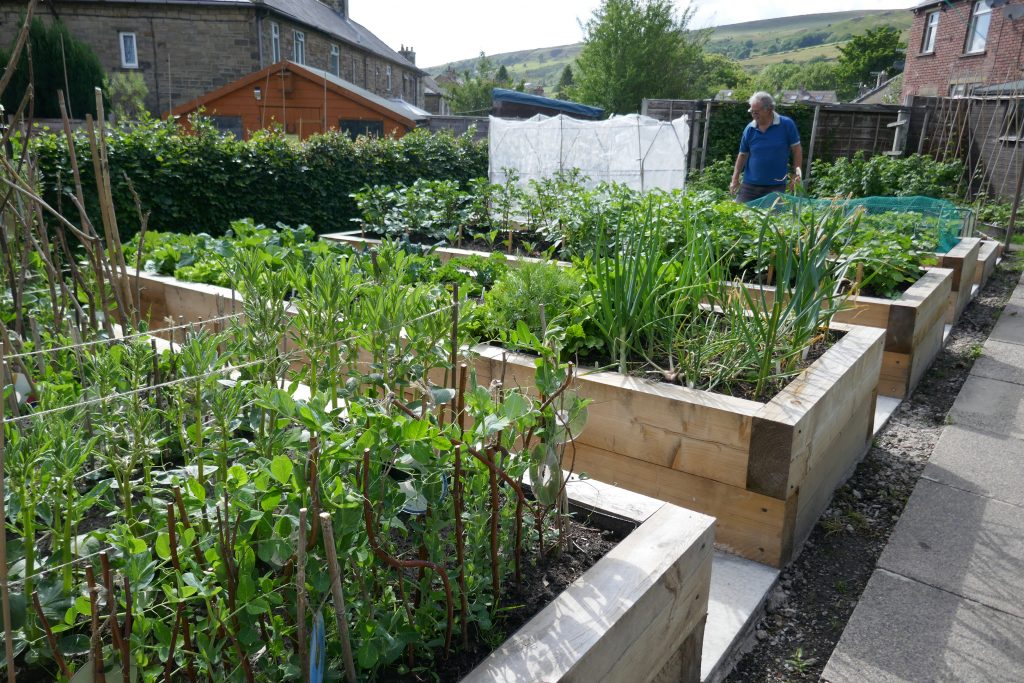
We have also found it easy to cover the beds with plastic sheeting during the winter since the rainfall 600 feet up in the western Pennines is much greater than that encountered in Co. Durham. Without the protection the ground becomes compacted.
The internal width is sufficient to allow space for three potatoes, four cabbages, three kales, two sprouting broccolis, seven garlics/onions/leeks per row. Interplanting is aided by having a good view of the plants’ development. On the evidence of one year, the height seems to be too great for carrot fly to be a pest, which is a boon after both Sedgefield and here earlier. However, careful planning is necessary to accommodate crop rotation, so we divide the length of the beds in half to give ourselves greater room for manoeuvre. The one vegetable we exclude from the new beds is climbing beans – a ladder would be needed to pick them.
In short we are very pleased with the new beds. Given their cost it’s perhaps as well!